Sunday, October 26, 2008
Friday, October 17, 2008
Monday, October 13, 2008
Recessed TOM
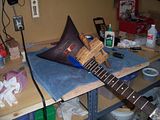
Recessed TOM to compensate for the lack of neck angle on the guitar.


I think my favorite build thing to do is a 3 degree neck angle set deep in the body so that the strings are still close to the body. The thing I dislike most about my Gibson V is the cavernous expanse between the strings and the body at the TOM. However the neck angle is really comfortable. On my King V I fixed this with a 2.5 degree neck angle and recessed the neck deep into the body.


I think my favorite build thing to do is a 3 degree neck angle set deep in the body so that the strings are still close to the body. The thing I dislike most about my Gibson V is the cavernous expanse between the strings and the body at the TOM. However the neck angle is really comfortable. On my King V I fixed this with a 2.5 degree neck angle and recessed the neck deep into the body.
Winging it
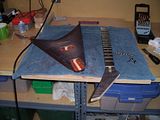
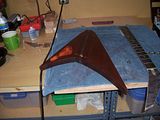
So I really haven't planned this guitar. I am just listening to music and working on it. The extreme thin profile coupled with spare parts approach to this build has prompted some interesting design decisions. No neck angle since the body was so shallow... (This might be my last guitar I build with no neck angle) and some strange jack placement. However I think the jack placement is going to work out well.


Friday, October 10, 2008
Cleaning tuners
So I started cleaning the Ibanez smooth tuners II that belong to the black DT-155 I am restoring...
They are nasty. There is a film of gunk on everything associated with this guitar. Acetone and Naptha are my friends right now. It is hard to see in the pictures but these are really really toxically nasty.

After the bath and brass brush...

They are nasty. There is a film of gunk on everything associated with this guitar. Acetone and Naptha are my friends right now. It is hard to see in the pictures but these are really really toxically nasty.

After the bath and brass brush...

Thursday, October 09, 2008
Notes on fret press
Fret work is rough on the hands. I am usually sore the day after a fret job. I guess because I don't like to use pliers to fit the fret wire. I run it through my fret bender then shape by hand. I have found pliers kink the wire and make high spots.
Notes on Fret Pressing:
Make sure the fret is square before pressing it in. I wasn't able to use a hammer because is was 1:00 in the morning but I took extra time to make sure that I had everything square.
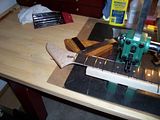
Make sure the curve of the fret matches the fret board exactly.
14" Radius on the fret board and the 12" radius insert will leave the middle of the fret sticking up if it is over bent. It happened on the first fret I pressed in. I ended up going back with a 16" radius insert and pressing the middle down.
Obviously if I had a 14" radius insert ($4.45 at StewMac) this might have been avoided but It will happen on compound radius fret boards also.
Support the neck. Either make a neck support or buy the one from StewMac. I also ended up needing some spacers to press the frets into the transition from the heal to the block part of the neck.
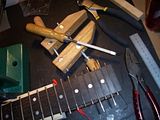
I learned 2 techniques when I worked as a Luthier. The hammer-in technique and the epoxy glue-in method. I am not a fan of the hammer in technique. I liked the glue-in technique but it was messy and unforgiving of poor fitting frets. The press in method is superior to all however it requires the fit of a glue-in and the technique from a hammer in (sort of...)
One other thing I am not a fan of is nipping fret ends with end cutters. I usually saw the fret ends off with a razor saw or a dremel. It is too easy to unseat a fret with a pair of end-nippers.
I will try a steeper fret end on this neck and see how it feels. I have always felt that 35 degrees was too lax but tradition has kept me from changing it. I am not doing hemispherical ends on this neck as it is too much work.
Notes on Fret Pressing:
Make sure the fret is square before pressing it in. I wasn't able to use a hammer because is was 1:00 in the morning but I took extra time to make sure that I had everything square.

Make sure the curve of the fret matches the fret board exactly.
14" Radius on the fret board and the 12" radius insert will leave the middle of the fret sticking up if it is over bent. It happened on the first fret I pressed in. I ended up going back with a 16" radius insert and pressing the middle down.

Obviously if I had a 14" radius insert ($4.45 at StewMac) this might have been avoided but It will happen on compound radius fret boards also.
Support the neck. Either make a neck support or buy the one from StewMac. I also ended up needing some spacers to press the frets into the transition from the heal to the block part of the neck.

I learned 2 techniques when I worked as a Luthier. The hammer-in technique and the epoxy glue-in method. I am not a fan of the hammer in technique. I liked the glue-in technique but it was messy and unforgiving of poor fitting frets. The press in method is superior to all however it requires the fit of a glue-in and the technique from a hammer in (sort of...)
One other thing I am not a fan of is nipping fret ends with end cutters. I usually saw the fret ends off with a razor saw or a dremel. It is too easy to unseat a fret with a pair of end-nippers.
I will try a steeper fret end on this neck and see how it feels. I have always felt that 35 degrees was too lax but tradition has kept me from changing it. I am not doing hemispherical ends on this neck as it is too much work.
Monday, October 06, 2008
Neck work on the RRV
Dressing the fretboard. Real Ebony is so hard to come by these days I was extra careful to only remove what was needed to fix the chipping from removing the old frets. I used CA to fix all the chips then sanded it smooth.


The headplate and drop-top for the body are matching flamed maple w/a walnut veneer. Gluing the headplate on was easy ... the drop-top was a nightmare.


The headplate and drop-top for the body are matching flamed maple w/a walnut veneer. Gluing the headplate on was easy ... the drop-top was a nightmare.


